

Leather Cosplay Tutorial
Hey everyone! If you’ve ever thought about cosplaying something with leather, you’ll notice that even buying a small swatch can be super expensive. Even if you buy old leather coats to cut down for fabric, it can still be costly. Fortunately, there’s a way to fake it that’s a bit cheaper than the real thing!
Supplies:
- Suedecloth — I used about 5 yards for my entire costume
- Craft foam — I recommend the slightly thicker foam. If you can get it in a color close to the fabric you’re using to cover it, buy several sheets
- Tacky glue — Regular Elmers might work, but Tacky glue was perfect
- Scissors
- Hole punch/ leather punch — If the costume needs cording to sew it together
- Sewing Machine
- Black thread/thread darker than your suedecloth to add shadows
- Hand sewing needle
I Decided to make a Skin-that-stalks cosplay from Dragon Age Inquisition, and I knew that I needed yards of unbroken fabric to get the panels looking like they came from one (halla?) hide. I wanted to use suedecloth as a slightly cheaper option, but the fabric is flimsy and has no body to it. In order to make it hold its shape, I needed to mount it to something else that I could cut into a shape and hold it. Enter craft foam!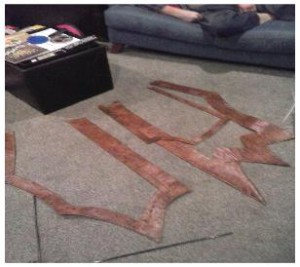
The leather panels look like this without the fabric panels. They’re about 4 feet tall by 3 feet wide, all solid fabric.
Given the weird shapes of my costume’s panels, I thought it would be easier to just build the leather strips directly onto the pattern itself. First I made newspaper mock-ups of what I wanted the skirt panels to look like, then I drew in where the leather strips would be. Using this as a base, I more or less puzzle-fit and cut pieces of craft foam over top of the sections designated for leather.
When I had them in the shapes I wanted, I carefully turned the pieces over and used painters tape to hold them together. (You can tape the front together if you’re worried about things falling apart, but the glue will not stick to the tape as well as it will to the craft foam!)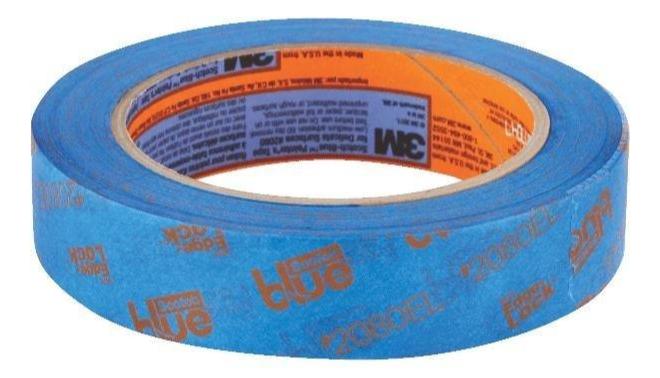
It’s probably weird to have brand loyalty for painters tape, but Scotch Blue tape is my favorite.
Another thing to note– if you look carefully at the costume design, it looks like most of the panels are actually doubly-edged with leather strips. You can do two separate panels, but it weakens the integrity of the edge of the costume, and could risk some loosening issues later on. Instead, you simply sew down the center of a double-width panel– more on that later.
The trickiest part of this build was cutting the fabric. I wanted to allow for about an inch of fabric on either side of the foam to allow for folding, creasing, and general covering of foam with fabric. In corners where the costume flairs into a point or curves, I had to make perpendicular cuts in the fabric to allow for ease and give me some wiggle room in covering everything.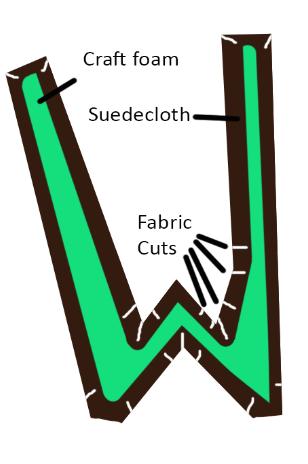
Back of the panels. Fabric was glued in small sections to the back of the green craft foam.
With the fabric cut, apply tacky glue to the front of the foam pieces– just the front for now. Don’t worry if some of the glue seeps through, just wipe it away with a paper towel or napkin. You’ll end up with a speckly look that actually gives the fabric a more natural appearance.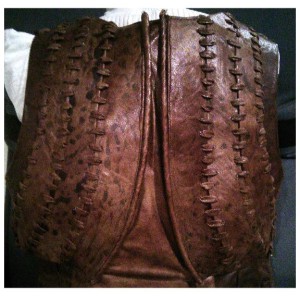
For less speckling, use a thinner coat of glue. I wanted a sort of spotted/patterned look, so I left more glue in place.
Allow the top to dry completely before turning it over and gluing down the edges to the back of the foam pieces. For interior corner sections, cut towards the corner to allow the fabric to fall flat to either side of the corner. Let this sit and dry completely before moving it.
Now, I mentioned the dual strip issue. Instead of cutting a separate panel and then gluing them together, you can simply use your machine to sew in a groove. Use something like a leather needle, and use dark thread to give the appearance of shadows. You may want to use a piece of chalk or something difficult to see to draw out the line ahead of time, and then you can sew over that line to partition the leather without causing any weakening.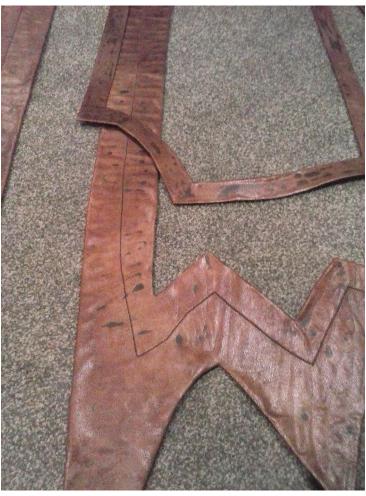
Leather strap outlines with the partition line sewn in (close up, no holes punched)
This costume also called for copious amounts of “laced” leather strips– that is, leather panels that were laced together with theoretically leather cording– which, by the way, is also super expensive. Suedecloth to the rescue once again!
First, you’ll want to make miles of cording. I don’t have an exact length of how much I made and used, but I would estimate at least 50 yards for all of the belts, panels, and vest. To make it easier to lace stuff, don’t make the cords you work with too long, or they’ll tangle and fray. I recommend working in 10 yard strips of cording at a time. You can stitch the lacing together on the back of your panel to make things seem more continuous.
I made the cord from 1 inch strips of my suedecloth. To make them longer, I sewed the ends of these strips together, similar to how you would make bias tape. Here’s a helpful tutorial for how to make continuous bias tape: https://www.youtube.com/watch?v=obuQzUtdYIQ
Remember to make sure that all of your seams are on one side of the strip!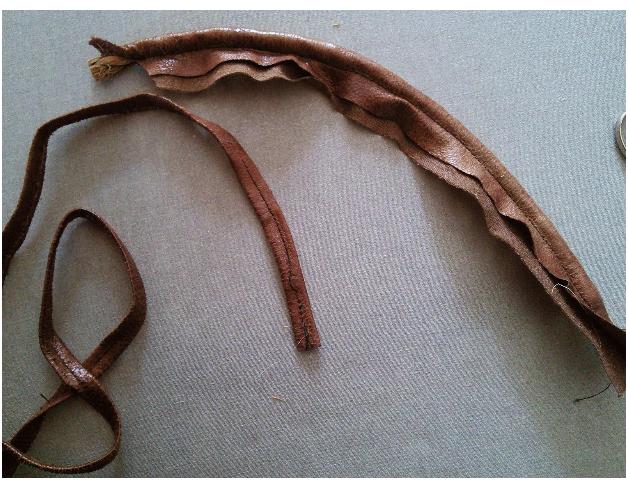
An example of the fabric strip used for lacing the panels together on the left. On the top/right is cording made to edge the vest.
When you’ve got about 10 to 20 yards of this one long fabric strip, I recommend steaming the seams flat. This makes it easier to fold in the next step. With everything pressed as flat as possible, I then folded the strip into thirds, covering the seams and sewing down the middle to keep it secure. This made a strong yet flexible cord that matched my “leather” for lacing everything together.
For the hole punching, I used a grommet punch since it’s meant to go through fabric, and leaves a nice round hole. A leather punch would also work, although I believe they’re a bit more expensive. You may be able to get away with a paper hole punch depending on your fabric, although mine was too tough for it to work. I do not recommend using a hammer, nail, and block of wood; it frays the fabric and is a pain in the butt to pull apart.
When you lace this cording through the holes, make sure that the cord faces up so that the edges of where you folded the fabric are hidden. This will give your lacing a cleaner, more consistent look, and help hide any obvious seams.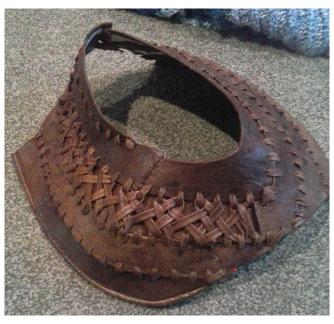
Laced vest panels.
Inside my vest with “laced” cording and panels sewn together. You can even see some leftover painter’s tape! (oops)
To help me keep track of where the holes needed to go, I used a marker to indicate how far apart the holes should be (usually about an inch or so). I completed each side one at a time– that is, I did the center lacing first, and when that was done, I punched holes for one side and then laced it up. When that side was done, I did the other side. This helped me keep track of which hole lined up with which, and made it less likely for the fabric to fray while I handled it.
Note: Since I was using dark fabric, marker smudges weren’t an issue. If you’re dealing with light colored fabric, consider using a fabric marking pencil instead.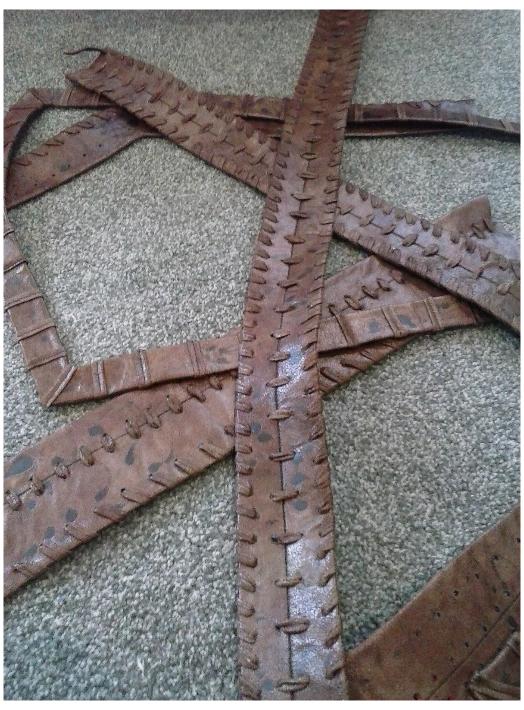
Punched and stitched belts– Note the bottom strip has holes, but no lacing yet!
You will inevitably come to a point where you have a leftover cording tail when you finish lacing up a section, or you run out of cord before you finish. If you run out of cording, make sure that you end your lacing with the tail on the back side of the leather. You can then sew this tail to a stitch from a previous hole, or you can lace the new cord through the next hole and then sew the ends together. When you get to the end of the section that needs lacing, simply cut the cord with enough allowance for you to sew the tail in place, either to another stitch or to the back of the leather itself.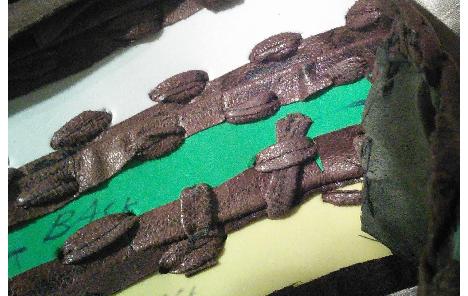
Sample of how I sewed/tucked tails into the back of the laced sections.
And that’s it! Pretty simple stuff, but the fabric looks good both up close and far away, and photographs nicely. Good luck in your projects!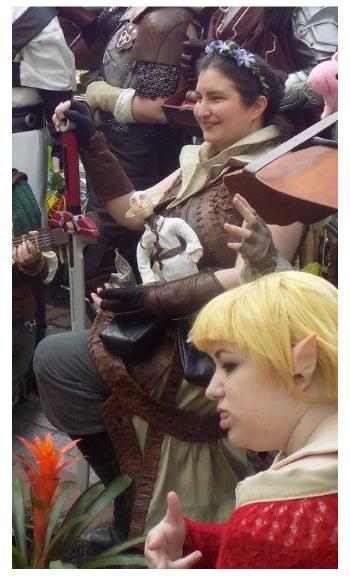
Image by Jillian Vessalius
For more from Katherine Jay, check out http://sirladysketch.tumblr.com/
For more cosplay, check out http://www.indigo-comics.com/2015/10/20/dianaprince-cosplay/
Spread the word!